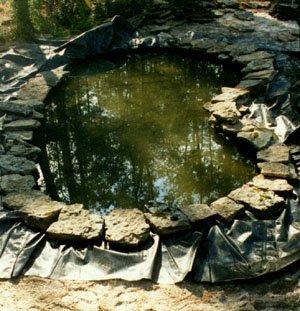
How To Build a Pond: Rock Placement
After the pond is almost full, place the first layer of decorative stones or bricks around the sides overhanging by about 2 inches. Wait until the water is almost to the top!! If you start placing rocks before that, the water will pull the liner AND your rocks in the pond and you will have to start over. So go eat lunch while the pond is filling up. You may pile the rocks one or more layers thick depending on how high you wish to raise the level of the pond above ground level. If the ground is uneven or lower on one end, you will put a second layer to level the pond. Water is always level! You will need about one ton of 1" - 4" flat veneer rocks for a 6' x 10' pond. I use Arkansas Moss Rocks which, here in New Orleans are pricey - $.30 a pound. I suspect if you are near the source, they are not as expensive. If you build a waterfall, you will need more.
How To Build a Pond: Placing the Final Rocks

When you get one or two layers of rocks on top of the liner, stand inside the pond, grasp the edge of the liner and pull it toward you on top of the bottom layer of rocks about six inches. Put another row of rocks on top. Make sure no liner is showing through the cracks-cover cracks with thinner rocks. Finish filling the pond. Now the water is above the surrounding ground.
You have built your pond slightly above the level of the rest of your yard so that it will not collect runoff from surrounding areas. Also the water above ground level gives the pond enough weight to keep it in its place when the water table gets high. And the bottom layer, (now under water) not only looks great and completely hides the liner, it also serves as a hiding and spawning place for fish.
No comments:
Post a Comment