Tuesday, May 22, 2012
Clearing up Green Water
I started my pond fresh a few months ago. I scrubbed it down (gag!) and cleaned it the best I could without poking a hole in the pre-fab liner with my foot. I have a small 50 gallon that usually plagues me with all sorts of issues. I noticed that literally about 9 hours after scrubbing it down there was, no joke, at least 2 inches of algae growing on the sides. It was like magic. I let it go.. I had one potted plant in it and that was it for then.
The weather got warmer and I dropped an Eco-Bio block in it since I had that in the plastic pond liner I had on my side porch to keep my fish alive during the winter. So, my fish were transferred to the outside green pond. I then dropped two water hyacinth in there and that was it. So two floaters and one potted plant and my 4 comets.
Let me tellya, this pond is CRYSTAL clear. There is not one speck of algae in it. I usually have the terrible green water.. string algae and whatnot. I have never been able to see beyond 6 inches below surface. We have had some spells of 98 degree weather for days on end.. I can see to the bottom of this pond. I am wondering if it's not the Eco Bio block I threw in there. What else could it be? I am baffled but happy.
Also, before I put the fish in there, there was the sweetest frog. He would croak at us every time we went out.. nice little fella. Well, as soon as the fish were put in there.. GONE! He split. Why won't frogs stay with the fish?
My fish aren't anywhere near large enough to eat him.. what's the deal? I want both, not either or. Perhaps when my algae bog cleared up, he wasn't interested anymore!
Pondlady sez:
I suspect it was the Eco Bio that did the job. And chances are your frog is around somewhere, just dug in to get out of the heat.
Put some submerged vegetation in under those hyacinths, don't feed those fish and you will have clear water all summer. And keep using the Eco Bio thing. Looks like it is working!
Read about keeping your pond water clear and more in my new book, A Practical Guide for Building and Maintaining your Pond. You can download it here
And join us at pondlady.com for more pond info. Ask questions and get expert answers.
Monday, May 21, 2012
The Pond is too Small
I live in Orlando, florida and have recently installed a pond on my patio. It is a 25 gal. above the ground barrel pond with 3 anacharis and 2 hardy water lilies. I have a fountain and a filter as I have a few fish in the pond. I also have a snail and a plecostamus for cleaning. the filter is rated for 50 gal. My question is how can I stop the goldfish (4 of them) from eating the water lilies? At one time I had 14 lily pads and now I am down to just 8. the lilies are still putting out new growth but they seem to only last about 1-2 weeks before they turn black and die. The snail and pleco take care of the remains. I feed the goldfish about 2 times a day as they are constantly at the water surface. Is there something I can do? Or am I just missing something? The patio is screened in so there is no chance of outside invasion. Thanks,
Pondlady sez: I think I am hearing several problems here. 1) Your fish are eating your water lilies
2) Your lilies are turning black and dying.
3) a combination of the two
2) Your lilies are turning black and dying.
3) a combination of the two
I have a question for you.....is it the lily pads or the lily blooms that are turning black and dying. If it is the blooms, they open and close for about 3 days and then die. You must cut them off at the base of the plant, remove them and not let them foul the pond water. If it is the lily pads, you have some sort of lily disease, probably aphids.
Mix up a solution of a quart of water, a tsp of vegetable oil and a few drops of dishwashing liquid and spray the lily pads. Remove all the black ones before you do that.
If it is your fish eating your lilies, you have too many fish. You may have one linear foot of fish per 25 square foot of pond surface.
If you are feeding your fish, they are getting too big for your small pond. They should eat the anacharis and the anacharis grows faster than the fish can eat it. So, trim back your fish population, buy a few more bunches of anacharis so you have 1 bunch per sf of pond surface, stop feeding the fish and you should be OK.
Oh, and you really don't have enough room for 1 water lily let alone two. So give one away to a friend and keep yours trimmed back. Trim the outer ring of pads whenever a new ring forms. They may be turning black because they can't be in the water.
Read about problems like this one and more in my new book. YOu can download it here.
If you have pond questions, you can get answers at my website, pondlady.com
See you there.
Sunday, May 20, 2012
Water Lily Division

Questions asked and answered at pondlady.com
Question
My water lily floats . There are so many roots that it bust out of its pot and the roots are huge. I guess I have to find a huge pot and keep it down with rocks somehow? It takes up almost the whole pond.
Answer:
It is time to divide and repot the lily.
Read about water lilies and more in my new book, A Practical Guide to Building and Maintaining your Pond. Download it here
Ask your questions and get answers at pondlady.com
Join us today at pondlady.com
Saturday, May 19, 2012
Filamentous Algae aka Blanketweed aka String Algae
We get questions:
Hi, It's me again.
I worked furiously in March to clean out my pond, and you all were a great help. However my enthusiasm, and your great help did not prevent the weather in PA from going cold for the month of April. So I let my pond sit, with the waterfall going 8 hours a day from mid March to now.
I have been calling nurseries around here waiting to get some new plants in there, and then once the plants came in I would put in the fish (I found a guy for that too) however, looking at my pond 2 months after the clean out i see what looked like a green haze, or some fine green cotton candy, I pulled some out and see that it is more like seaweed.

Is this good (that I have food for my future fish), or is this bad (that all the stuff I tried to remove in March is coming back), or something in between?
FYI the nurseries around here are claiming that the water plants should not go in until memorial day.
Thanks in advance
ANSWER
That is filamentous algae. Which species it is is difficult to determine without a microscope. Note that it is most abundant just below the waterfall, where there is a strong current. It likes moving water. Your pond area looks susceptible to influx of nutrient from rain runoff. Nutrient runoff into the pond, especially phosphorus, is the likely source of your algae growth. With your small pond, the best treatment is to first stop the runoff into the pond and then manually remove the algae. I suggest the use of a toilet brush.
Here is a good article on filamentous algae in ponds:
Filamentous algae
More discussion:
After you remove as much of the string algae as you can, you can use Microbe-Lift PL to keep it gone. H202 works too. Also I have poured a can of beer in a week and that works. Cheap beer.
But the fish do love to eat it. It's we humans who think it's awful.
Put plants in your pond after the last danger of frost has passed.
You can read more about blanketweed, aka filamentous algae, aka string algae in my new book, A Practical Guide to Building and Maintaining a Pond" Download it here
Join us with your questions at pondlady.com
Friday, May 18, 2012
Snails in Ponds
Question:
My fish(gold fish) winter with a friend, but we bought some more this winter to keep in an aquarium to grow up to be pond fish. We also bought a large snail. We have had him/her (is there a way to tell?) for 5 months...no propagation. Can I put him in the pond with the rest of the fish now. He is all alone in the aquarium and we would like to shut that down. Also have a plecostomus...have heard conflicting reports weather the actually help or hurt the cleanup of the pond.
Thanks..
p.s. Don't know what kind of snail...he is about 1 1/2 inches or so. Fast mover...big mouth. If I put him in will he stay? Came from fish store.
I also wonder, will I be able to find him when we shut down for winter?
Discussion:
Sure you can put your snail in the pond. If you live where it freezes solid, your snail may not make the winter. Plecostomus are great fish for clean up, but as tropical fish, often they do not survive winters either. They do in the deep south and lemme tellya, nothing will wake you up faster than having one that is 6 or 8" long slither over your bare foot while you are cleaning a pond.
Snail is now in pond, would like to get a few more but worried I will end up with 37,000 of them.
Yes, I live in northern Wisconsin, all our fish come indoors for winter. Our pond is only 2.5 feet deep.
I am new at ponding..probably wouldn't have chosen to do so but I bought a house that had a large pond and waterfall in the back yard. We are learning.. your site has been very helpful. Went the other day and got several bunches of anacharis grass, some hyacinth and water lily. We are not feeding our fish!
Our pond gets full sun for only an hour to an hour and half a day the rest of the time it has light/dappled shade. I will check to see if we have enough cover for fish.
What temp should my pond water be staying around for plants and fish to be happy? Right now it is around 70* F.
Further discussion
The 70º temps are fine. Below 55 is when you can start to have problems.
You need one bunch of anacharis per square foot of pond surface and one linear foot of fish per 25 sf of pond surface.
To catch fish in the winter, pour warm water in the pond. The fish will come to the warm water.
You are right about the snails. One is good. Two = thousands and they crunch under your bare feet.
Your water lily may not bloom well with little sun, but try it and see. Can't hurt.
You can read about snails and more in my new book, A Practical Guide to Building and Maintaining your Pond.
Download it here.
And for discussions like this one, join us on pondlady.com
Thursday, May 17, 2012
Spring Pond Care
|
Preparing for Spring
Spring has arrived here in New Orleans, where I live, so it's time for spring pond care. I know you folks who live in northern climes are still feeling some nip in the air, so you will wait a bit before prepping your pond for spring.
But for us, we are excited that our fish are swimming around, our plants are poking green shoots above the water, our waterfalls have come back to life and we are relaxing out of doors in our wonderful spring weather.
We cannot relax just yet, because our temperatures are still fluctuating as are yours. Just because you have a 70 degree F day does not mean that you can start feeding koi. They must not be fed until the pond water temperatures are stable at 55 degrees F at night. Remember, if you have a balanced pond and no koi, you never feed your fish.
Things to Have
Check your filter. It is clean? Even if it looks clean, it probably is not. So give it a good cleaning. If you have a biofilter, give it a kick start with a bacteria/enzyme product like Microbe-Lift PL to ensure a good bacteria colony starts to grow in your biofilter.
Check your pump. Clean it up. Check all your hoses for leaks or cracks. Nothing is worse than coming home from work and finding your pond dry because a hose leaked and your pond is nearly dry.
Make sure you have a dechlorinator on hand. You will need it. I know you think you won’t, but you will. Here’s what happens. You decide to top off the pump. The phone rings. Then you realize you need to get to the bank before it closes, so you dash out. While you are out, you decide to take care of a few more errands. You return home a couple of hours later. Oops!! Your yard is flooded and your fish are lying motionless at the bottom of the pond. Add dechlor immediately. Start the pump is it was not already running. 90% of the time, you can save your fish.
Keep Microbe-LIft PL on hand for blanketweed or string algae growth. With warmer temperatures, algae begins to grow quickly.
Check your nets. Are they useable? It might be time to replace them.
It never hurts to have a few hose clamps in your pond drawer or on your pond shelf. Those rascally things always break when you don’t have any spares.
Do you have spare pumps? If so, check them now to see if they still work. Often when a pump is stored out of water, seals can break, especially if the pump was in a freezing garage or shed.
Things to Do
If you have chemicals, fertilizers or fish food left from last summer, throw it away. Most likely they have lost potency or have become rotten. It’s best just to dispose of them and start over.
If you have leaves or other debris in your pond, remove it now. As the water heats up, the debris begins to decompose, fouls your water and fish can die quickly. Spring is a great time to totally clean out your pond. Remove all water, all equipment, scrub the sides lightly (no soap), rinse, use a wet vac to get the last of the dirty water out and then replace everything. Your fish and plants will thank you for it.
Check your fish for any illnesses or wounds. If your fish are still a big sluggish, leave them alone. They are not fully awake until the water temperatures are consistently above 55 degrees F.
Within a couple of weeks after your water reaches 55 degrees F, you can start exchanging 10% of your water weekly. Pond water is the best fertilizer in the world. Pump it into your veggie or flower beds. Water exchanges keep nitrites from building up and keep your fish alive, healthy and happy.
Check your water plants. Spring is a great time for dividing and repotting. Remember, do not use any soil full of organic matter. I have had my best luck with water plants by potting them up in sand. I do not fertilize any pond plants except water lilies. They grow fast enough utilizing fish waste without having those plants leaping out of their pots by adding extra fertilizer. If you have extra plants after you have divided them, you can give them to a neighbor or friend. Remember, though, that many water plants can grow in low, damp spaces in your garden. So if you have taro, umbrella plants, or papyrus, plant them in your garden. Be aware they are very, very invasive, so be careful where you put them.
If you have lost some of your cover or floating plants, now is the time to replace them. Your fish are happiest with 1/2 of the top of the pond covered. That gives the fish a place to hide from predators and keeps them cool in the heat of the summer. It also keeps the blazing sun from helping algae grow in your crystal clear water.
Water lilies will start to grow when the water reaches about 65 degrees consistently. If you removed them from your pond and stored the corms in damp sand, you can pot them up and put them in the water with the top of the pot about 6” below the water surface. Do not fertilize them until the first leaves reach the top of the pond. Then use an aquatic plant fertilizer. I use a tab that I can just poke into the sand. If I am out of those, I have used Job’s Tomato Spikes or lacking those, Job’s Tree Spikes. Take the tree spike, whack it with a hammer to divide into 4 pieces. Use one piece at a time. Throughout the summer, your lilies want to be fertilized at least once monthly. Do not over fertilize or you will be feeding algae as well as your pond plants.
Things to Watch Out For
Be careful as you are beginning to play in your pond again. Big Daddy bullfrog is snoozing between rocks lying in wait for a tasty fly. If you disturb him, he will jump and scare the pants off you.
Learn more about pond care in my new book, A Practical Guide to Building and Maintaining your Pond. Download it here
Get pond questions answered now at my website
We have a good time there talking about our ponds.
|
Wednesday, May 16, 2012
Water Lily Question

Water lily question:
I recently introduced 6 fully grown water lillies to my 5000 gal pond. The leaves are starting to yellow and some have small brown/black spots on them. It is a full sun pond with a pump transferring water at rate of 600 gal per hour.

Pondlady sez: It could be that the water lilies need feeding. They like to be fed every 10 - 14 days with Pondtabbs or other aquatic plant fertilizer. The also like to have the tops of their pots at least 18" below the surface of the water and are happier even deeper. And remember, the outer ring of leaves gets yellow and needs to be pinched off periodically so the new leaves can grow. Same with the flowers. They will open and close for about 3 days and then die. Pick them off immediately.
Another reason for yellow leaves could be the placement of the plants. Water lilies hate to be in moving water. Especially if the water is hitting on the pads. If that is happening, move the lilies. 6 full grown lilies could easily be too many for your pond.
Read this tips and more in my new book, A Practical Guide to Building and Maintaing your Pond. Get it here.
You can also find great pond information from our experts at http://www.pondlady.com
|
Tuesday, May 15, 2012
Skimmers? Are They Worth the Money
A skimmer is a plastic box mounted outside the pond and accessed through a hole the liner. It is underground and mounted just at water level. They usually contain both a pump and filter media. The purpose of it is to suck leaves, right into skimmer instead of letting them settle to the bottom of your pond. The leaves and debris usually sink to the bottom of the pond before they flow into the skimmer, so I advocate not buying them. They cost a bunch of dollars and require a huge hole through the liner that has a tendency to leak after a few years and can give you all kinds of problems you don't want.
They do provide water level safety not letting the pump pump all the water out of the pond if there is a waterfall problem, because they are up from the bottom by 2 ' inside the skimmer.
Find more about skimmers and more in my book, A Practical Guide to Building and Maintaining your Pond. Download it at Amazon
Also, join us at my website, pondlady.com for more pond info. Get your questions answered by experts.
Monday, May 14, 2012
Pond Pump Troubleshooting
If your pump stops pumping, touch it to see if it is running. You will feel it humming. If it is, check hoses. Unplug the pump and look at the impeller to see if something is stuck in there. If it is not running, check your GFCI outlet. You do have one, don't you? If not, get one. If so, push the button to reactivate the circuit. If it does not come back on, you probably have a defective pump. If the circuit continues to break, let it dry out and try it again.
Submersible pumps have a safety switch built in that turns the pump off when it gets too hot. Intermittent starting and stopping means your pump is getting too hot, shutting itself off and when it cools, it is starting again. Soon your pump will stop altogether having burned out. Start planning for a new pump as soon as your pump begins its intermittent behavior.
If the impeller is not spinning freely, check to see if there is junk in there. Remove the junk with a screwdriver and keep moving the impeller with the screwdriver until the impeller moves freely.
To learn more tricks and tips like this one, download my book, "A Practical Guide to Building and Maintaining a Pond" here
For expert advice on pond problems or building a pond, join us at pondlady.com
We have a good time there.
Sunday, May 13, 2012
How to Build a Waterfall


The pond question I get asked most frequently is, “How do you build a waterfall?” And it is a hard question to answer. The easy answer is that I stack the rocks up until I like they way they look. Wouldn’t it be nice if that is all there was to it?
Waterfalls are a mix of art and engineering, a strong back and willingness to get wet. You must be in the pond with the pump turned on to properly build a waterfall.
Building a waterfall is either simple or difficult depending on the point of view of the builder. We want them to look natural, like they just started happening in the rocks of our gardens, never mind that we had to buy the rocks because we live where no rock has ever been found. New Orleans, where I live, has never grown a rock in its existence, so we have to buy them and make them look as if they, indeed, did grow here and so did the waterfall.
Keep It in Scale
Most people want a huge waterfall that is completely out of scale for their pond and would look better in front of a casino in Las Vegas. Others want a tiny waterfall that just trickles. My job is to know what they really want, build it and know ahead of time that they will love it.
Using a Weir
The easiest way to build a waterfall is to use a weir. A pond weir is a plastic box. It collects water that the pump has pumped into it. One side of the box is lower than the rest and has a lip on it so water will go over it and back into the pond.
These can be effective when building a waterfall. Simply elevate them above your pond, usually positioning them level in the dirt you have dug out to make your pond, put tubing from your pump into the weir. When the weir fills up, a sheet of water will fall over the weir and into your pond. You can hide the weir with rocks so no one can see the plastic box. Also, if you have a biofilter, you can put it in the weir. As an aside, if you do have a biofilter and use lava rocks in it, put them in several mesh bags, not just one. It takes several strong men to lift just one bag out, so use at least three. I usually float some hyacinths or other floating plants in the weir to further camouflage the plastic box.
Building a Natural Waterfall
My favorite way to build a waterfall is to start with a semi level surface, slightly raised in the back, at the same level as your pond in front. From there, standing in the pond, build the waterfall using the same kind of rocks you used in your pond construction. Start with large, flat and thin rocks. You can’t build a waterfall with either round rocks or little ones. ALWAYS put your rocks on top of your liner. After you put the first large rock down, run water from the pump over it to make sure the water flows into the pond. If it does not, shim up the rock in the back. If you don’t start on a slight angle, water will fall off the back and drain your pond dry in a few hours. Next, stack two or three thick and chunky rocks on each end of the bottom rock. Those rocks can be as much as 5 or 6” thick. Make sure they are flat on two sides because you are going to build the rest of your waterfall on top of them. If you have two large flat rocks on the ground level, you need more chunky rocks to rest the second level on.
Use two large thin rocks side by side on the bottom to make a wider waterfall. Wide is better than high.
Next place the second level of flat, thin and large rocks on the chunks. Again run water over to make sure the flow is going in the pond and not over the edge. Continue making levels, shimming as needed, until you like your waterfall or you run out of rocks.
I have found that the easiest way for me to build the falls is for me to be in the water and have a couple of strong helpers placing rocks for me. I can then move them around until they are where I want them.
The Engineering Part of Waterfall Building
The back of the waterfall is equally important. Shimming must be done to keep the angle toward the pond and proper placement of rocks is most important to ensure stability of the falls. You don’t want the entire structure falling in the water during the first wind, nor on someone’s foot when they walk close to see how you did that.
The Art Part of the Waterfall Building
To finish your waterfall, place your hose or hoses where you like them, put a rock on top to hold them in place. Now put a tiny rock in front of the hose to spread the water out. Put some plants in the back to hide your hoses and soften the rocks.
You will be amazed at your talent and so will your friends.
You can find this and more pond information in my book, "A Practical Guide to Building and Maintaining your Pond." Download it at amazon.com
To ask pond questions and get answers from experts, join my pond website at
Saturday, May 12, 2012
Variegated Acorus
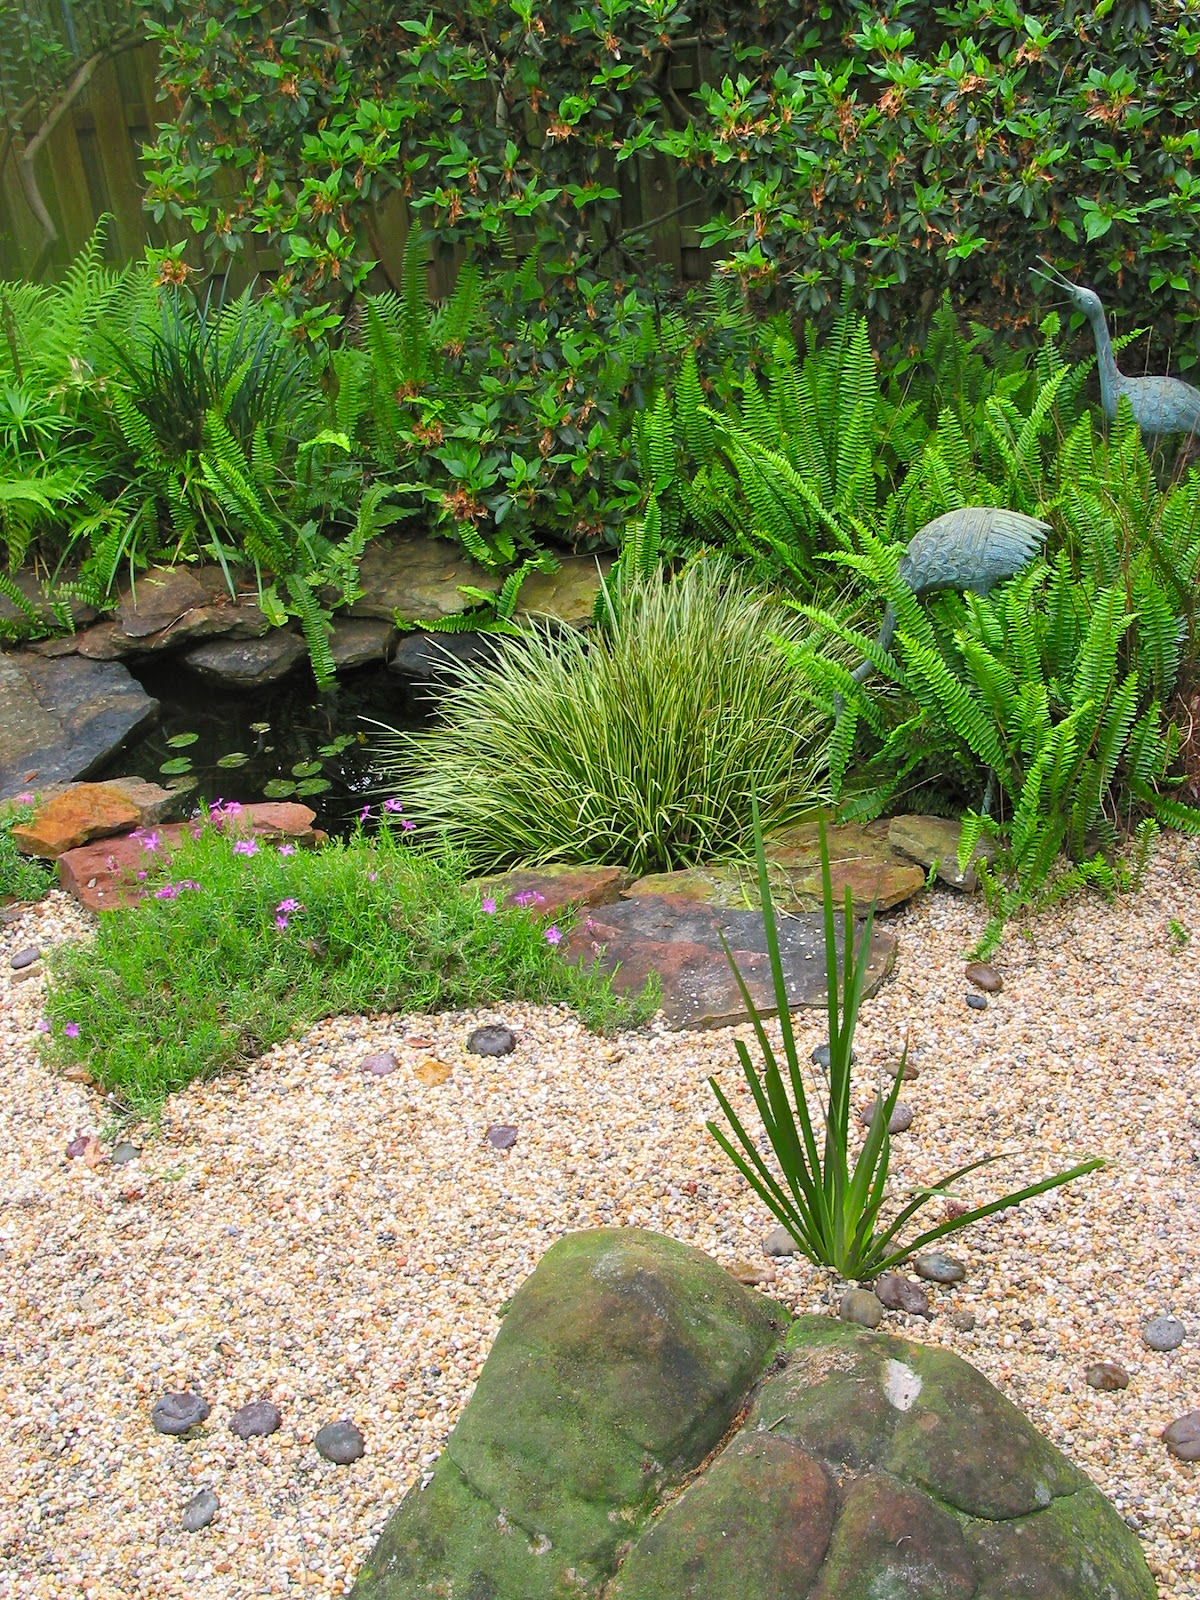
Acorus, middle of picture, installed in Ocean Springs MS
Variegated Acorus is a sweet flag, invasive as hyacinths. It grows naturally along banks of any water, maybe a mud puddle if the puddle is there long enough. I keep it potted up in the pond to keep it under control. When starts jumping out of its pot, just whack off all the stems coming from every hole in the pot. If you don't watch out, it will break the pot in its haste to get free.
It gets 12 - 18" tall in the pot and then starts getting wider. I usually divide it yearly. After a few years, people will start avoiding you if they see you coming with more acorus to share with them. But it is pretty, not grown for its flowers, but for the foliage.
It can handle partial shade and is hardy, surviving in zone 5 down to zero degrees or colder. I am sure it doesn't grow as fast and furious in the cooler weather like it does in zone 9a where I am.
Acorus gets scale...all the time. Here's what I do. I cut the acorus back to about 1" tall and suberged the pot, plant and all. When it comes back up out of the water, the scale is gone, drowned.
You can buy my book that talks about aquatic plants and more at

And join us at pondlady.com for more info about your pond.
Friday, May 11, 2012
National Teachers Week
National teachers' week this year was May 7th to 11th. Who knew we had a teachers' week? Isn't every week teachers' week? Shouldn't it be?
We don't much care about teachers in the US. We want babysitters for children. As far as learning, we want mediocre. We like mediocre. After all, folks who don't think are easier to control by the institutions that run the country, so keeping complacency and apathy as something to aspire to is important. Being intellectual is considered slightly peculiar and something to avoid.
We have not respected teachers in our history. Teaching was relegated to women and historically women's jobs have been underpaid and pushed to the bottom of the professional heap.
I wish that education was prized in the US. I grew up in the 40's and 50's when going to school was something we looked forward to and couldn't wait to do. In my little town in Michigan, teachers were looked up to and admired. I was taught and I learned. By fantastic teachers.
I had teachers who expected all of us to learn, to pay attention and to treat the classroom as a special place, an honored place, a place to have fun and respect everyone else in the classroom, including the teacher.
My parents were deeply involved in my education, meeting my teachers. They were concerned about how well I was doing in school. I learned. I made it through the necessary classes with tough teachers who would not accept anything except the best I could do.
Because of teachers, I carried on in school until I got a terminal degree in philosophy. My teachers were so impressive that I wrote thank you notes to my teachers that inspired me throughout my elementary and secondary school years. They were incredible.
Wouldn't it be great if we as a country felt that way? Respect teachers. It's good for your kids, good for the family and good for the country.
And because of those teachers, I have written a book. A Practical Guide to Building and Maintaining your Pond is available here:
You can get more pond information at my website here:
Thursday, May 10, 2012
Disappearing Water


Water levels way down at Blanchard Springs, near Mountain View AR
We all know that one of the biggest problems facing the world today is lack of water. Our rivers are being diverted to cities for ever growing need, to farms for irrigation to grow food for animals to eat and we are losing water to climate change. Our colder regions are not getting as much snow and warmer regions are not getting as much rain as 20 years ago. So our rivers are drying up, our lakes shorelines are receding and we should fear for the shortage of potable water.
So, we want to have a pond. Is this wasting a precious resource? Is it just another example of people putting want above need? I say no. Well, it's because you are a pond builder, you say. Still, I say no. People want vast expanses of lawns. In their gardens, in public spaces. Lawns take vast amounts of water, water that could otherwise be used for satiating the thirst of people. Lawns get irrigated, they get fertilized, they get cut using gas gulping machines that pollute the atmosphere. And next week they get all those things again.
Ponds get filled with water once a year ideally. They need topping off occasionally when conditions lead to evaporation, but that's rare.
Ponds need little maintenance and certainly never need mowing. They provide places for wildlife to visit, breed and live. Birds, bees, toads, frogs and yes, the occasional bird eating egret or heron to get dinner.
Ponds can be used for growing food if owners wish, but even if they don't, they are beautiful additions to the landscape and don't use precious resources.
If you want to build your own pond, my book can help you do that. It really isn't hard to do. Download it here
If you want to get more information about ponds, join us at pondlady.com to meet other pond builders and pond keepers.
Wednesday, May 09, 2012
How to Grow Water Lilies

Water lilies must have a minimum of five hours of direct sunlight daily in order to bloom heavily; the more sun, the better
Fertilize your water lilies at least once monthly. They would prefer twice a month. There are several brands of lily fertilizer and they are all OK.
Water lily flowers open each morning and close each night unless they are night bloomers which do the opposite. The flowers live about three days and die. Pick it off at the base when it dies. As the pads yellow and die, pick those off at the base as well. The outer ring of pads dies first.
Place your water lily pot as deep as you can in your pond. They like to have the top of their pots at least 6" below the water surface. I put them at the bottom of the pond....at least 18" below the surface.
Pot up water lilies in wide, shallow containers rather than thin and deep ones. Dish pans are good, but they really would like to have a perforated pot, so water can flow through the soil.
If you have a natural bottom pond and plant a hardy water lily in the bottom, soon you will have a pond covered with water lilies, choked with water lilies. There is no way to remove them except to rake them out. And they will return in the spring. Planting them in pots does delay the take-over for a few months, but they will take over. And you will be writing to me asking how to kill them. Remember you put them there and watched them grow.
Learn more from my book, A Practical Guide to Building and Caring for your Pond. You can download it here
To ask the experts, join us at pondlady.com
Learn more from my book, A Practical Guide to Building and Caring for your Pond. You can download it here
To ask the experts, join us at pondlady.com
Tuesday, May 08, 2012
Preparing for Spring

Spring has arrived here in New Orleans, where I live, so it's time for spring pond care. I know you folks who live in northern climes are still feeling some nip in the air, so you will wait a bit before prepping your pond for spring.
But for us, we are excited that our fish are swimming around, our plants are poking green shoots above the water, our waterfalls have come back to life and we are relaxing out of doors in our wonderful spring weather.
We cannot relax just yet, because our temperatures are still fluctuating as are yours. Just because you have a 70 degree F day does not mean that you can start feeding koi. They must not be fed until the pond water temperatures are stable at 55 degrees F at night. Remember, if you have a balanced pond and no koi, you never feed your fish.
Things to Have
Check your filter. It is clean? Even if it looks clean, it probably is not. So give it a good cleaning. If you have a biofilter, give it a kick start with a bacteria/enzyme product like Microbe-Lift PL to ensure a good bacteria colony starts to grow in your biofilter.
Check your pump. Clean it up. Check all your hoses for leaks or cracks. Nothing is worse than coming home from work and finding your pond dry because a hose leaked and your pond is nearly dry.
Make sure you have a dechlorinator on hand. You will need it. I know you think you won’t, but you will. Here’s what happens. You decide to top off the pump. The phone rings. Then you realize you need to get to the bank before it closes, so you dash out. While you are out, you decide to take care of a few more errands. You return home a couple of hours later. Oops!! Your yard is flooded and your fish are lying motionless at the bottom of the pond. Add dechlor immediately. Start the pump is it was not already running. 90% of the time, you can save your fish.
Keep Microbe-LIft PL on hand for blanketweed or string algae growth. With warmer temperatures, algae begins to grow quickly.
Check your nets. Are they useable? It might be time to replace them.
It never hurts to have a few hose clamps in your pond drawer or on your pond shelf. Those rascally things always break when you don’t have any spares.
Do you have spare pumps? If so, check them now to see if they still work. Often when a pump is stored out of water, seals can break, especially if the pump was in a freezing garage or shed.
Things to Do
If you have chemicals, fertilizers or fish food left from last summer, throw it away. Most likely they have lost potency or have become rotten. It’s best just to dispose of them and start over.
If you have leaves or other debris in your pond, remove it now. As the water heats up, the debris begins to decompose, fouls your water and fish can die quickly. Spring is a great time to totally clean out your pond. Remove all water, all equipment, scrub the sides lightly (no soap), rinse, use a wet vac to get the last of the dirty water out and then replace everything. Your fish and plants will thank you for it.
Check your fish for any illnesses or wounds. If your fish are still a big sluggish, leave them alone. They are not fully awake until the water temperatures are consistently above 55 degrees F.
Within a couple of weeks after your water reaches 55 degrees F, you can start exchanging 10% of your water weekly. Pond water is the best fertilizer in the world. Pump it into your veggie or flower beds. Water exchanges keep nitrites from building up and keep your fish alive, healthy and happy.
Check your water plants. Spring is a great time for dividing and repotting. Remember, do not use any soil full of organic matter. I have had my best luck with water plants by potting them up in sand. I do not fertilize any pond plants except water lilies. They grow fast enough utilizing fish waste without having those plants leaping out of their pots by adding extra fertilizer. If you have extra plants after you have divided them, you can give them to a neighbor or friend. Remember, though, that many water plants can grow in low, damp spaces in your garden. So if you have taro, umbrella plants, or papyrus, plant them in your garden. Be aware they are very, very invasive, so be careful where you put them.
If you have lost some of your cover or floating plants, now is the time to replace them. Your fish are happiest with 1/2 of the top of the pond covered. That gives the fish a place to hide from predators and keeps them cool in the heat of the summer. It also keeps the blazing sun from helping algae grow in your crystal clear water.
Water lilies will start to grow when the water reaches about 65 degrees consistently. If you removed them from your pond and stored the corms in damp sand, you can pot them up and put them in the water with the top of the pot about 6” below the water surface. Do not fertilize them until the first leaves reach the top of the pond. Then use an aquatic plant fertilizer. I use a tab that I can just poke into the sand. If I am out of those, I have used Job’s Tomato Spikes or lacking those, Job’s Tree Spikes. Take the tree spike, whack it with a hammer to divide into 4 pieces. Use one piece at a time. Throughout the summer, your lilies want to be fertilized at least once monthly. Do not over fertilize or you will be feeding algae as well as your pond plants.
Things to Watch Out For
Be careful as you are beginning to play in your pond again. Big Daddy bullfrog is snoozing between rocks lying in wait for a tasty fly. If you disturb him, he will jump and scare the pants off you.
This and other seasonal maintenance tips are in my pond how-to book. You can buy it here.:
At my website pondlady. com you can meet hundreds of other pondkeepers, ask questions and share your pond experiences. And we love photos. Show off your pond.
Monday, May 07, 2012
Seed Buying 101
I found this Seed Gardener's Glossary, printed and sent to me from http://www.ezfromseed.org
They have words defined in understandable language. I love that they tell us the difference between GMO seeds and heirlooms and hybrids.
Best of all they sell safe seeds, not genetically modified ones. Using their seeds keep our food supply safe and untampered with like Monsanto and other companies are doing these days.
What the big chemical companies are doing to our food supply is scary. Check it out and then check out this website.
No, I didn't get paid for this post. In fact, the EZ feed folks have no idea who I am.
A Practical Guide to Building and Caring for your Pond is doing very well and stays in the top ten seller at Amazon.
Make sure it stays here by clicking here and getting your own copy.
Join us at pondlady.com to read experts answers to your pond questions and ask your own.
Sunday, May 06, 2012
How to Repair a Pond Liner
You are sure you are facing repairing your pond liner. Before you panic, make absolutely sure it is a leaking liner and not another problem that is causing your water level to drop. Check your waterfall, check your hoses, check your spitters. Turn your pump off, fill up your pond. Watch it overnight. Did the level drop? If so, you probably have a hole in your liner.
The first thing you must do is find that leaking liner. If you can see it, skip the next section.
Fixing the leak
If you can see the leak, you have an easy job. Assuming your liner is rubber or EPDM and most are, you can patch it just like a tire. You can buy a patch online and while you are at it, buy a roll of patching material, because whatever caused that liner to leak will most likely do it again.
45 mil rubber liners rarely leak spontaneously. Something causes it. It could be raccoon toenails, doggie toenails, a falling tree branch, or maybe a piece of statuary with a sharp end fell and penetrated the liner. No matter the cause of that liner leak, repairing it, while not always a clean and easy job, it can be done by anyone with a bit of effort.
Make sure the liner surrounding the hole is clean and dry. I scrub the liner with the same scrubber you would use for dishes, just make sure there is no soap in it. After scrubbing it clean, rinse it and let it dry. If you are in a hurry, use a hair dryer, but be careful you are connected to a GFI before you use any electrical appliance around water. When the area is clean and dry, apply the patch according to the directions on the package. Your work is done. Fill the pond back up with water. Don't forget the dechlorinator.
Finding the leak
Finding a liner leak can be one of the most frustrating jobs on earth. The liner is black, usually dirty and wrinkled. The leak should be right at the water line because water can't leak out below that. Or can it? Here in New Orleans, our water table is only inches below the ground, so often there can be a hole in the bottom of the liner, but ground water pushes the bottom of the liner so a leak could well be on the bottom and ground water is seeping in the pond.
Pour some milk in the pond. If the water is leaking fast, the milk will make a trail to the leak. But if the water is leaking that fast, you have a huge tear and you can probably see it.
Pour some fine sand in the water. The sand will follow the water to the leak, but as above, if the tear is that big, you should need no help finding it.
Sometimes you cannot find the leak no matter how hard you search. I have resorted to this method as a last resort. Pump the pond water out. Remove all fish, plants, pots, lights, etc. Using a wet vac, vacuum the bottom to be sure all the fish waste, leaves, and other organic matter is gone. Rinse and wet vac again. Make sure the bottom is dry even if you have to wait several hours or get that hair dryer out again. When you are positive it is dry, stick a garden hose under the liner and turn on the water. Watch the liner carefully. Soon you should be able to see water coming up from underneath. You have found your leak. Dry it again and patch with patching material. Replace all pots, plants, fish, lights and refill the pond with water.
It's a good thing rubber liners rarely leak.
Leaks in concrete ponds
If your concrete pond is leaking, there is only one relatively cheap way to fix it. Because concrete is brittle and our ground is always moving, concrete is freezing and thawing, concrete is one of the hardest materials to repair. Clean out the crack and use Plumber's Epoxy to patch it. If that doesn't work, call a professional. If the professional tells you he can patch your concrete and guarantee it, doubt it. Doubt it a lot.
In all my years of pond building, I have never seen a serious concrete crack patched so it will hold water for more than a few weeks. Get your contractors guarantee in writing, get his home phone, his cell phone, his address and his Landscape Contractor's license number. Getting his insurance certificate can't hurt either.
If your pond is built from recycled swimming pool liner or PVC or visqueen and it has a leak, you must start over again with another liner. Same with pre formed hard liners. Once they crack, they cannot be repaired.
Luckily ponds rarely leak. But if yours does, you are now prepared.
All of this and more is included in my How-To pond book, A Practical Guide to Building and Maintaining Your Pond, available here
For information like this and even more join us at
pondlady.com
Subscribe to:
Posts (Atom)